Using with Scratch 2
Download
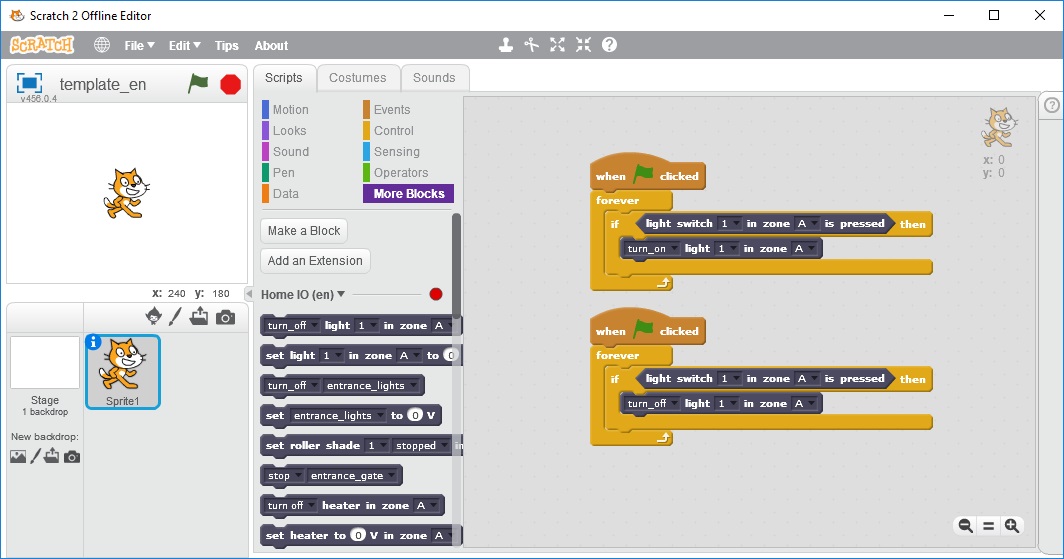
Home I/O can be used together with Scratch 2 through scratch extensions. On top of this page, you can download a Scratch 2 template file which includes the necessary Home I/O extension blocks. After opening this file in Scratch, click on More Blocks to see all Home I/O blocks. In order to use Home I/O devices in Scratch, they must be set to external mode first.
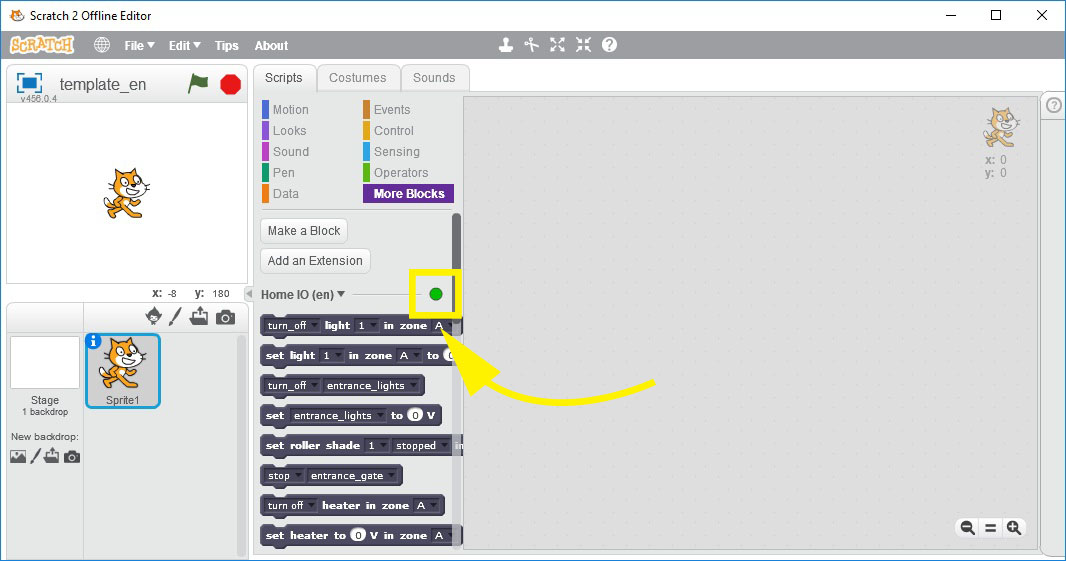
A successful connection between Scratch and Home I/O is indicated by a green light next to the Home I/O (en) extension.
Warning
Please note that when using Home I/O in French you must use the French template file in Scratch.
Note: Data exchange between Scratch and Home I/O is done through a built-in web server in Home I/O which is listening on port 9797. You may disable the web server or define a different listening port by editing the file settings.yml (found in the installation directory of Home I/O) and changing the fields RunScratch2Server and Scratch2ServerPort, respectively.
Sample Program
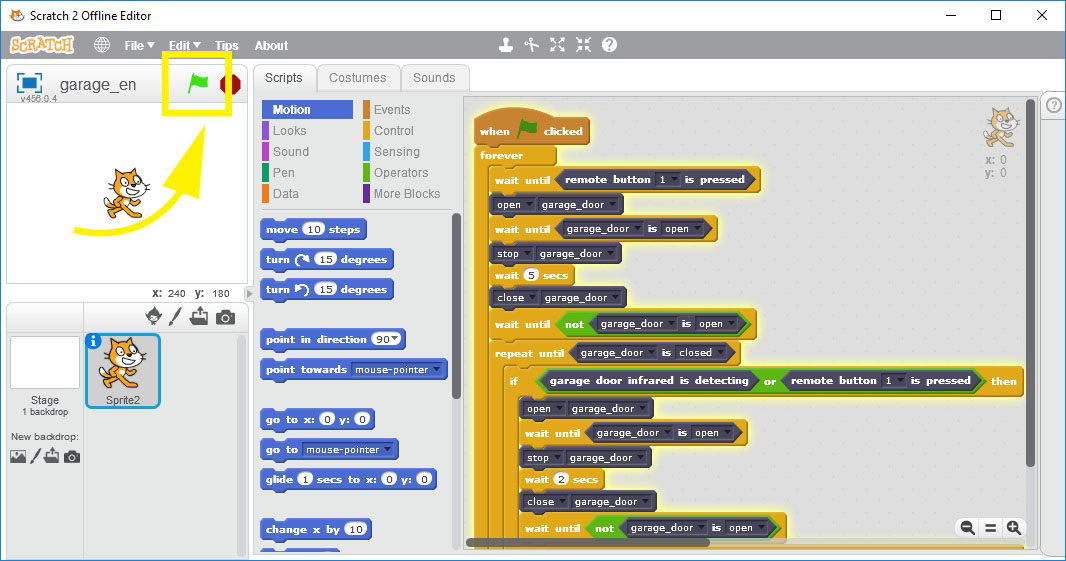
This Scratch 2 sample program controls automatically the garage door. To test it, download the Scratch file, open it and click on the green flag inside Scratch. Next, in Home I/O, set the garage door and remote control to external mode. Press the remote button 1 to open the garage.
Known Issues
Avoid using sensor blocks in more than one forever blocks, since it will make Scratch lose the connection with Home I/O and eventually crash.